Add Client
Use this page to register a new client in CTB Admin. A client is any individual or organization that purchases goods or services. Client records store contact details, identification information, and financial data used across invoices, payments, and reports.
Summary
Use this page to create a complete client profile before you issue invoices or record payments. A well-configured client record keeps reporting, communication, and balance tracking accurate.
When to use this page
- Onboarding a new buyer or business partner
- Creating a client profile before issuing invoices
- Storing client contact details and identification documents
How to access this page
From the sidebar, go to Business → Clients. On the Client List page, click the purple (+) icon in the top-right corner.
![]()
The system opens the Add Client Page.
Step-by-step instructions
- Open Business -> Clients and click the Add icon.
- Fill the Personal Information section.
- Fill the Business Details section and upload required documents.
- Fill Balance & Discount Information based on your business policy.
- Click Save to create the client, or choose another save option if needed.
Personal Information
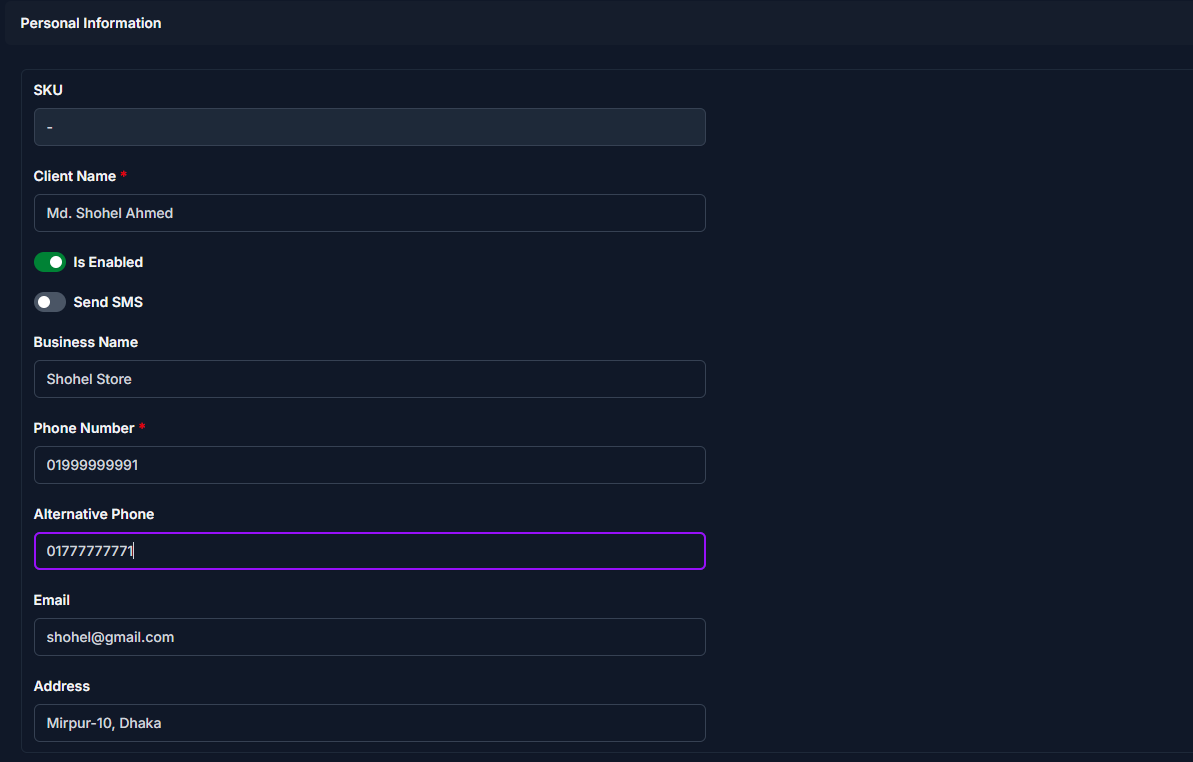
Fill in the following fields:
| Step | Field | What to Do | Description |
|---|---|---|---|
| 1 | Client Name | Enter client name | The name used in invoices and reports |
| 2 | Is Enabled | Toggle ON/OFF | Controls whether the client is active |
| 3 | Send SMS | Enable if needed | Sends SMS notifications for client-related activity |
| 4 | Business Name | Enter if applicable | Client’s company or trade name |
| 5 | Phone Number | Enter primary number | Main contact number |
| 6 | Alternative Phone | Enter if available | Secondary contact number |
| 7 | Enter if available | Used for communication |
Required Fields
Fields marked with a red star (*) are mandatory.
Business Details
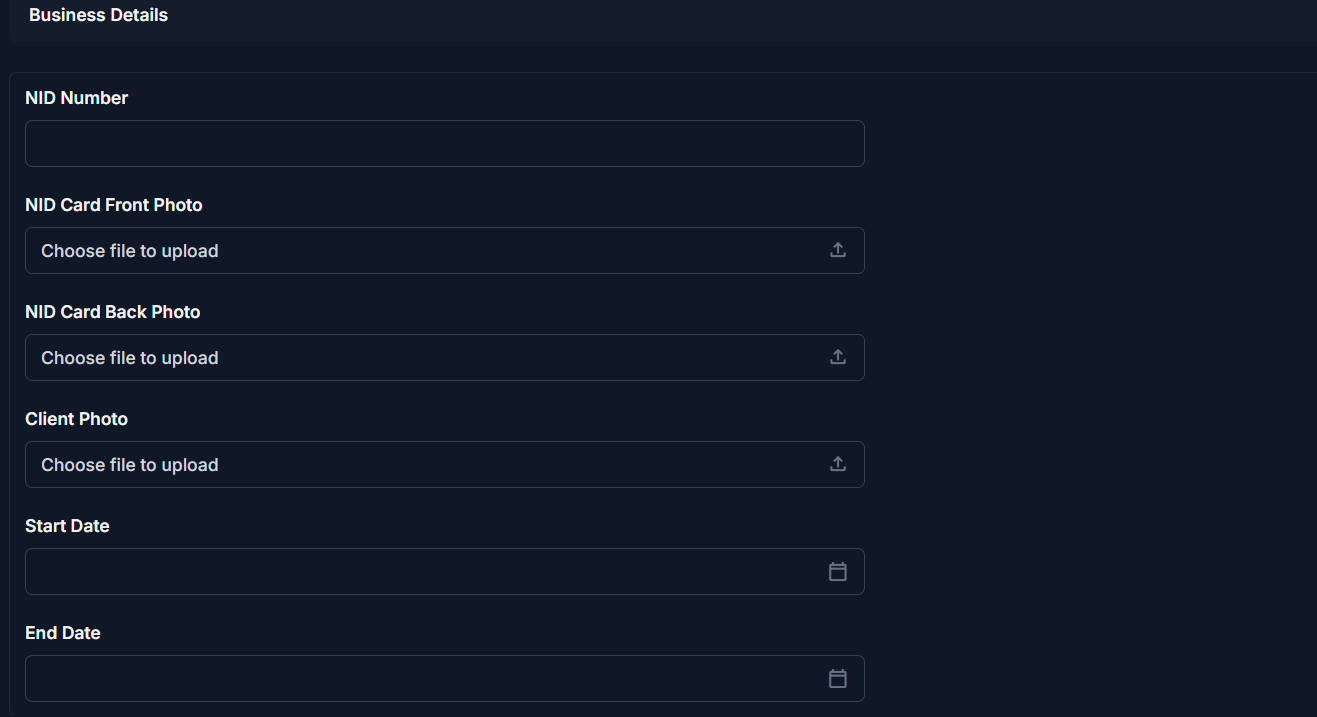
| Step | Field | What to Do | Description |
|---|---|---|---|
| 1 | NID Number | Enter NID number | Used for identity verification |
| 2 | NID Card Front Photo | Upload image | Front side of NID |
| 3 | NID Card Back Photo | Upload image | Back side of NID |
| 4 | Client Photo | Upload if available | Client profile photo |
| 5 | Start Date | Select date | When the client relationship begins |
| 6 | End Date | Select if applicable | Leave empty if ongoing |
Note
Upload clear images for proper verification.
Balance & Discount Information
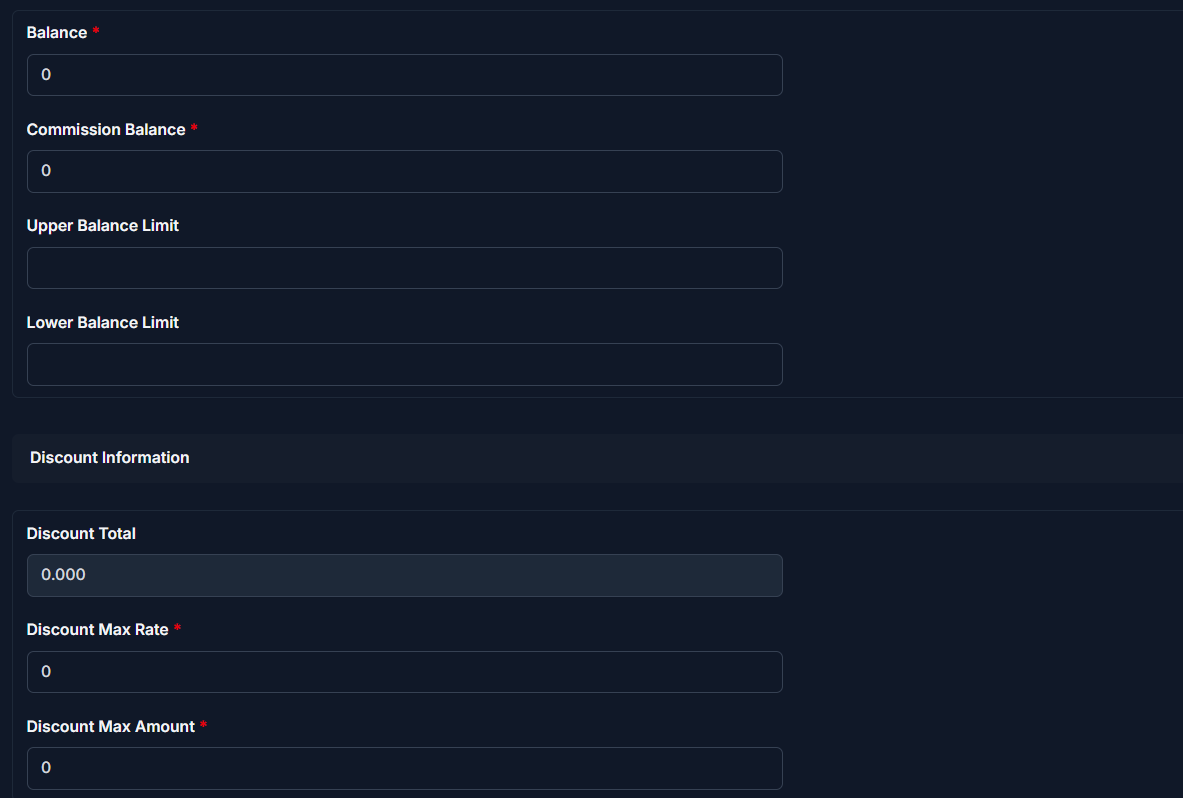
| Step | Field | What to Do | Description |
|---|---|---|---|
| 1 | Balance | Enter amount | Current financial balance |
| 2 | Commission Balance | Enter amount | Balance for commission transactions |
| 3 | Upper Balance Limit | Set limit | Maximum allowed balance |
| 4 | Lower Balance Limit | Set limit | Minimum allowed balance |
| 5 | Discount Max Rate | Enter rate | Maximum discount percentage |
| 6 | Discount Max Amount | Enter amount | Maximum discount amount per invoice |
Required Fields
Fields marked with a red star (*) are mandatory.
Saving the Client
After completing all sections:

- Click Save to create the client
- Click Save and add another to quickly add multiple clients
- Click Save and continue editing to save and stay on the page
Tips
- Ensure the Phone number is correct before enabling SMS
- Upload clear NID images for verification
- Leave End Date empty if the client is ongoing
- Configure Discount Max Rate and Discount Max Amount to control pricing
Related Pages
- Edit Client — Update client information
- Client Detail — View client profile and transactions
- Client Reports — Analyze client-related financial data