Edit Material
Overview
The Edit Material page allows you to update existing material information. This includes general details, inventory settings, and status control.
When to Use
Use this page when:
- Updating material name or description
- Correcting unit, cost, or stock values
- Adjusting reorder levels
- Enabling or disabling a material
How to Edit a Material
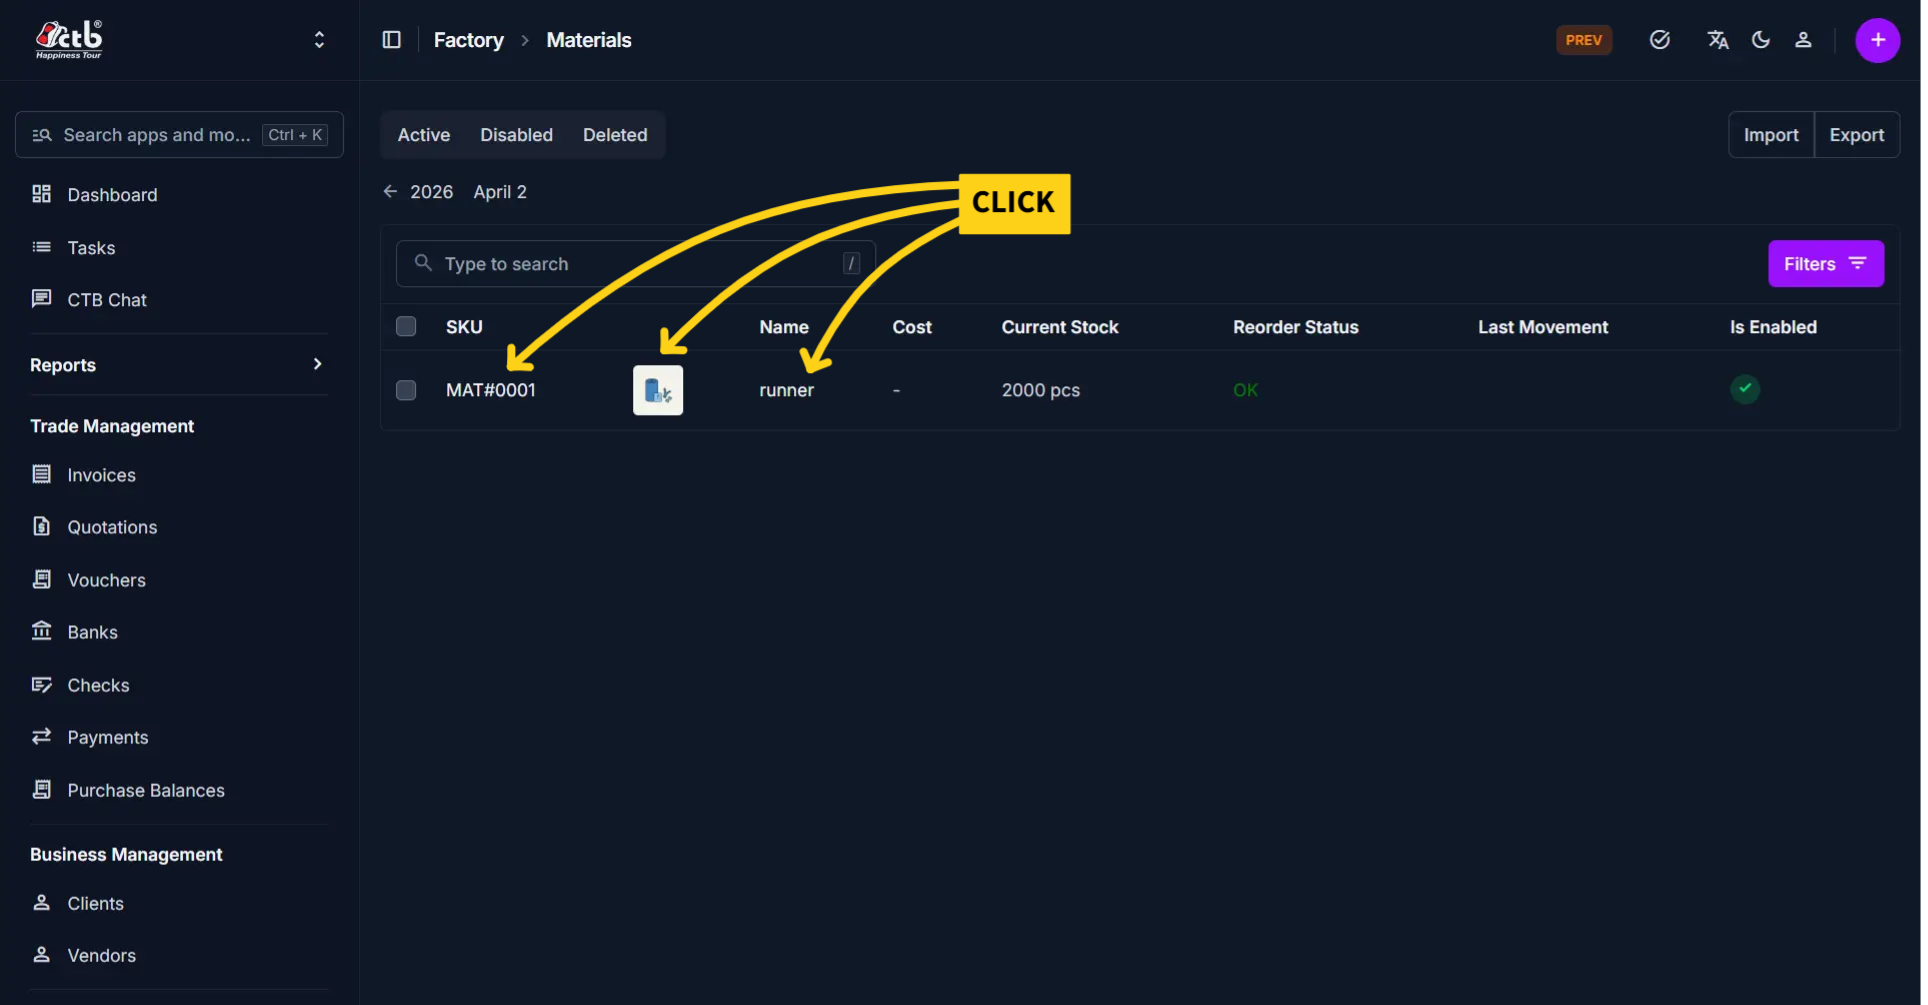
- Go to Factory → Materials
- In the material list, click on the SKU, Photo, or Name of the material
- The Edit Material page will open
General Information
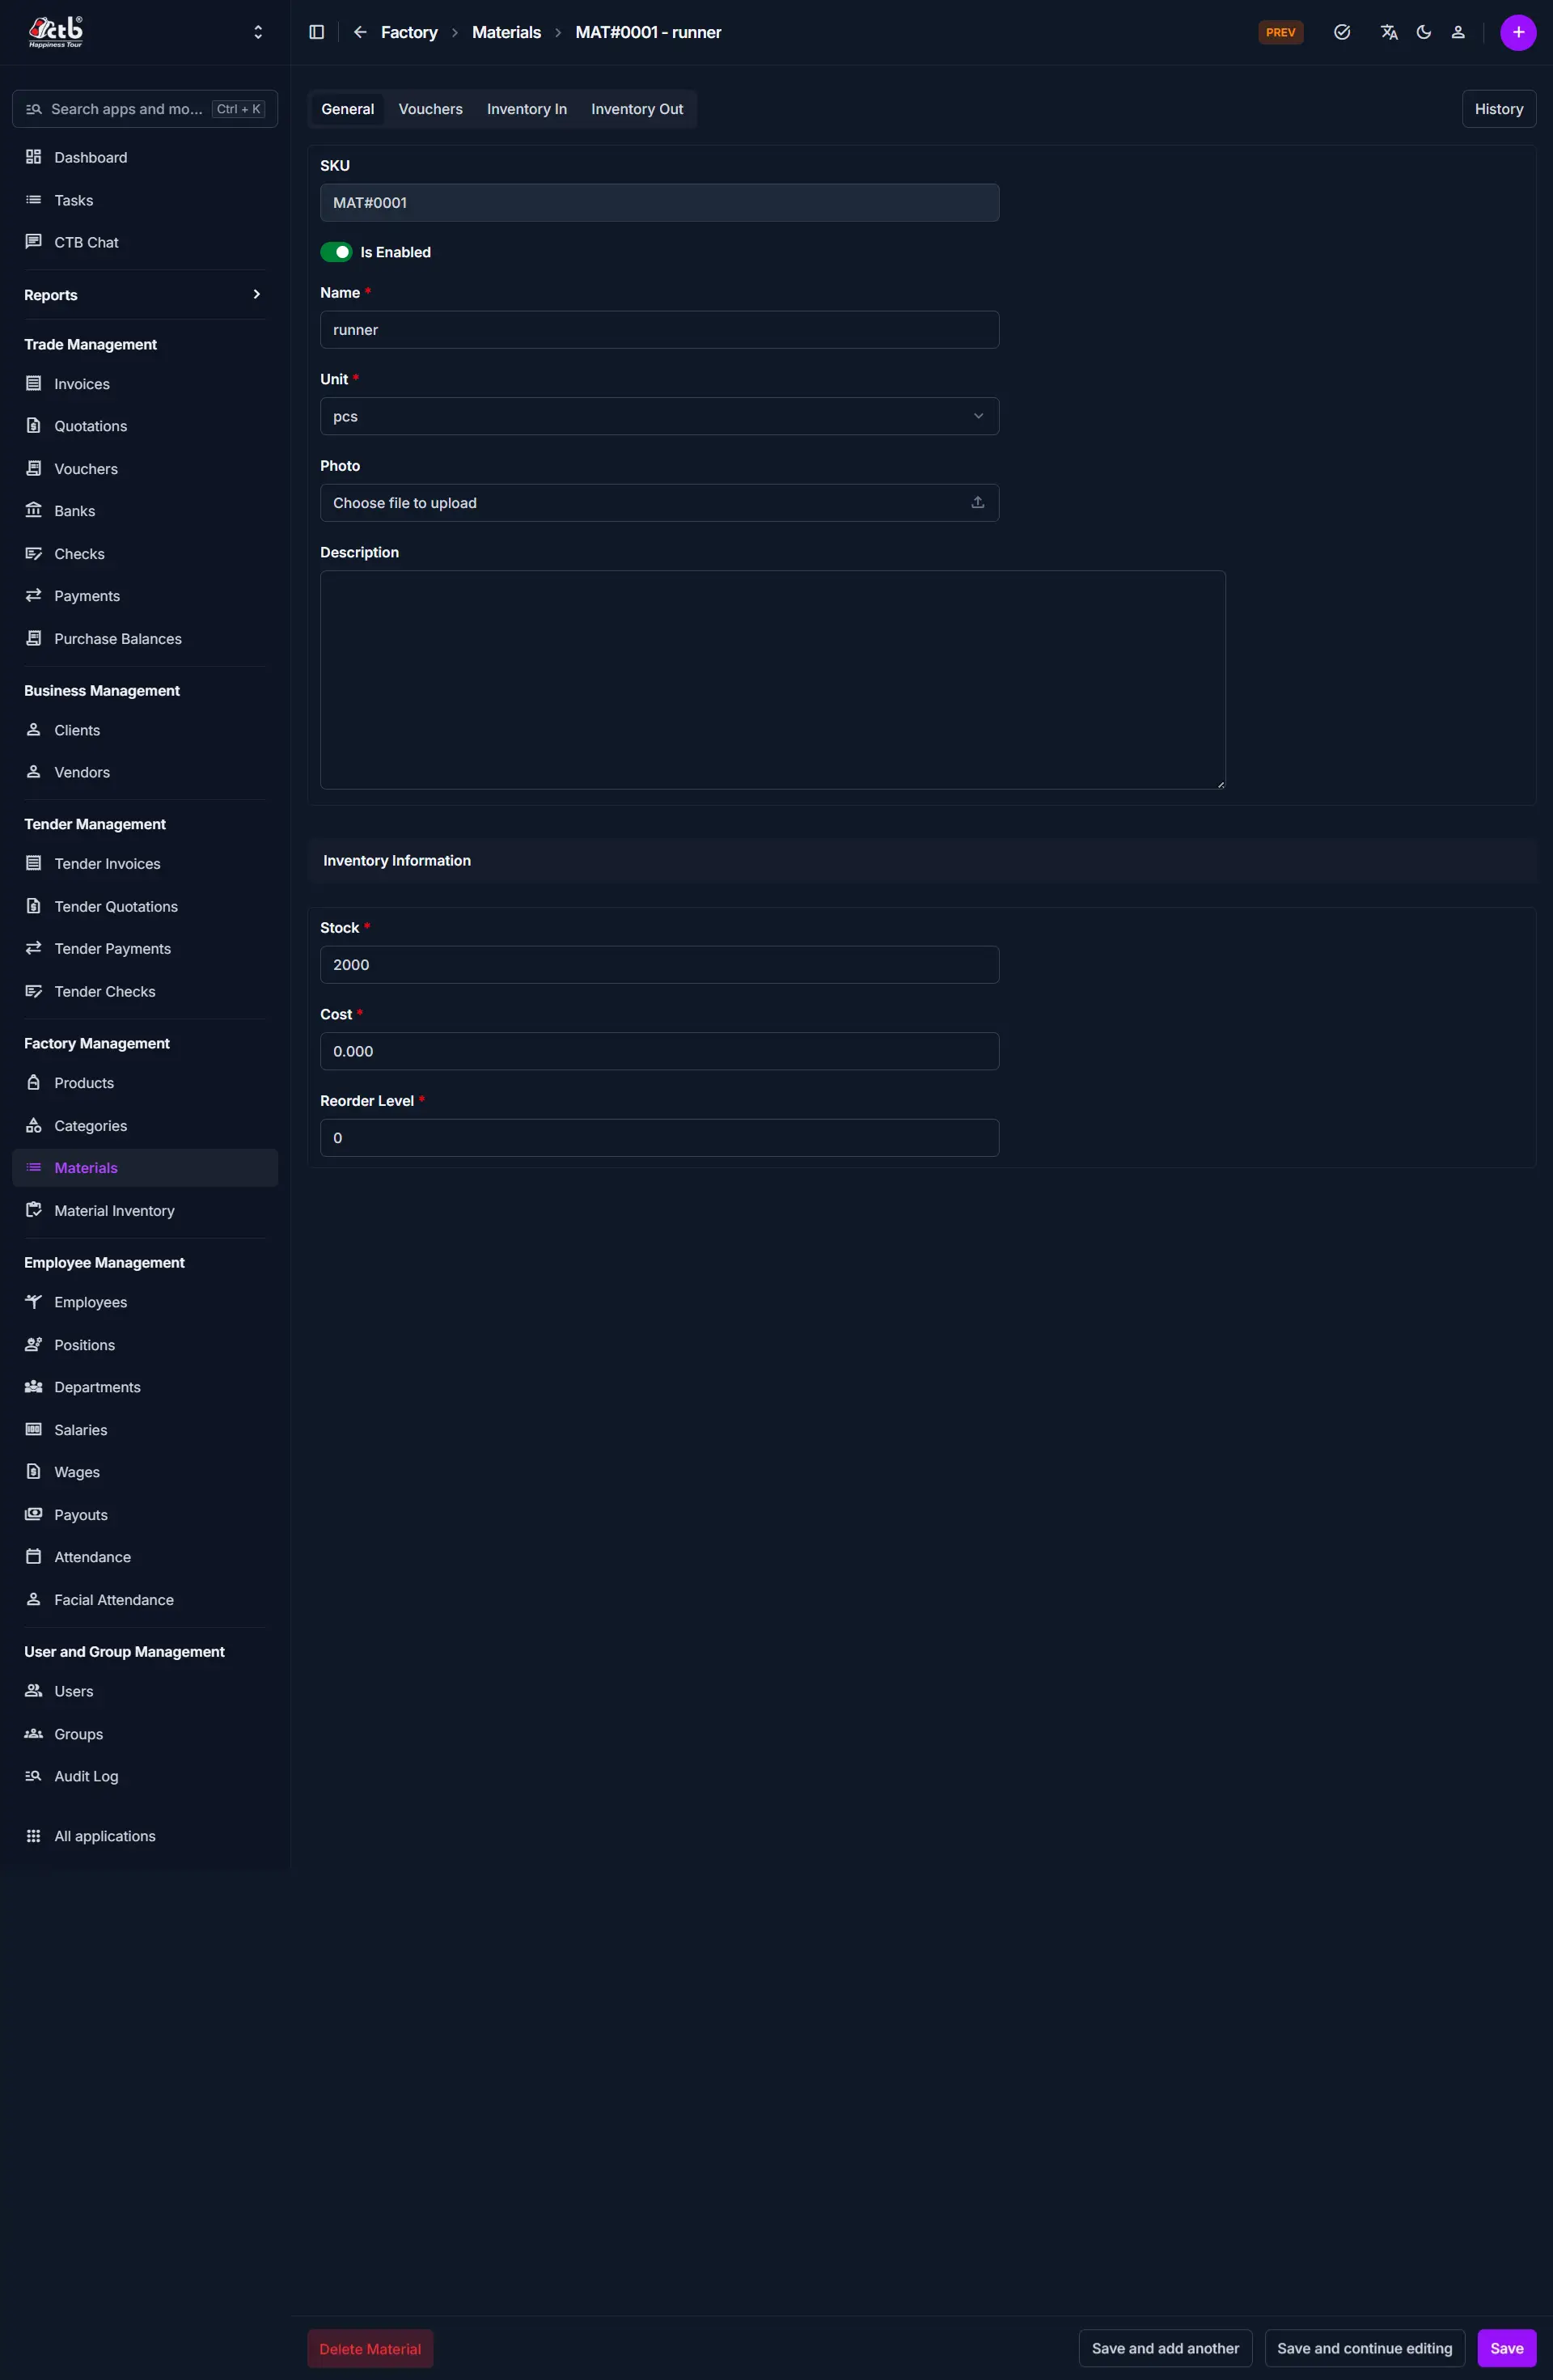
Editable Fields
| Field | Description |
|---|---|
| SKU | Unique identifier (usually not editable) |
| Is Enabled | Enable or disable the material |
| Name | Update the material name |
| Unit | Change measurement unit |
| Photo | Upload or replace material image |
| Description | Update additional details |
Inventory Information
| Field | Description |
|---|---|
| Stock | Update current available quantity |
| Cost | Modify cost per unit |
| Reorder Level | Adjust minimum stock threshold |
Best Practices
- Avoid changing the Unit after the material is already in use
- Update Stock through inventory transactions when possible
- Use Disable instead of deleting materials that are no longer used
Material History Page
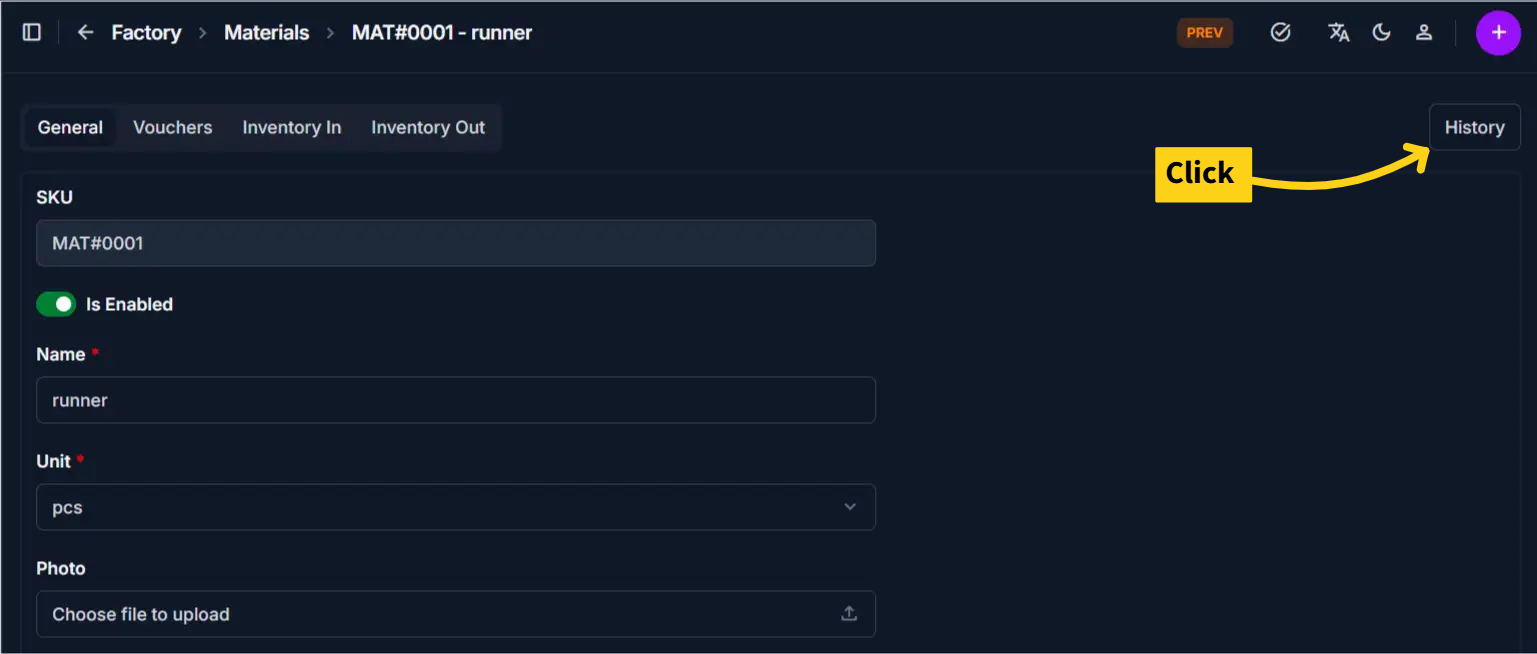
The Material History page provides a comprehensive audit trail for a specific material. It allows administrators to track changes, identify who made modifications, and revert to previous versions if necessary.
Overview
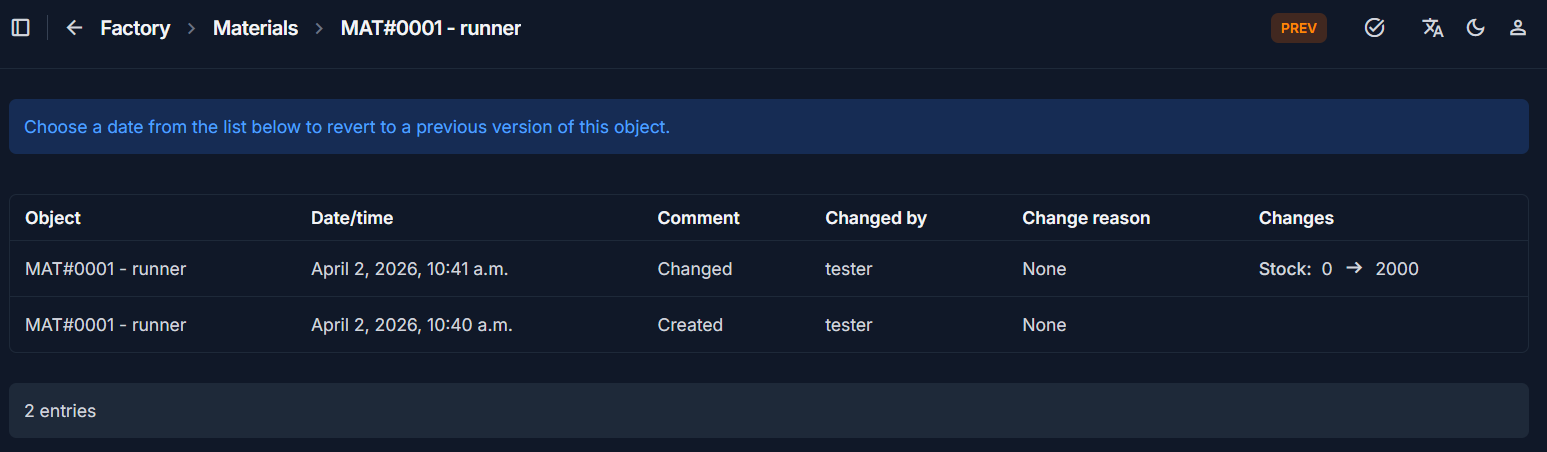
This page displays a chronological list of all actions performed on a material object (e.g., MAT#0001 - runner).
Tip: Choose a date from the list to revert to a previous version of this object.
History Table Details
The history table breaks down every modification with the following columns:
| Column | Description |
|---|---|
| Object | The specific material ID and name being tracked. |
| Date/time | The exact timestamp when the change occurred. |
| Comment | The type of action performed (e.g., Created, Changed). |
| Changed by | The username of the person who performed the action (e.g., tester). |
| Change reason | A note or justification provided by the user at the time of the change. |
| Changes | A detailed log of what specifically was modified (e.g., Stock: 0 → 2000). |
Key Functionalities
1. Tracking Stock Movements
The Changes column explicitly shows value transitions. For example, you can see exactly when stock was initialized or adjusted, moving from an old value to a new one.
2. Version Control (Revert)
By clicking on a specific entry, you can view the state of the material at that exact moment. This is essential for correcting accidental data entry or unauthorized changes.
3. Audit Accountability
The Changed by column ensures that every update is tied to a specific user account, providing transparency for inventory management.
Best Practices
- Review Before Reverting: Always check the Changes column to understand exactly what will be modified before choosing to revert to an older version.
- Provide Change Reasons: When prompted by the system during an edit, provide a clear "Change reason" to help colleagues understand why a modification was made (e.g., "Monthly stock count correction").
- Audit Regularly: Use this page to investigate discrepancies between physical stock and system records.
Important Notes
Warning
Changing Unit after transactions exist can cause inconsistency in inventory data.
Warning
Editing Stock manually may not reflect actual inventory movement history.
Related Pages
- Add Material — Create new materials
- Inventory In — Increase stock properly
- Inventory Out — Decrease stock properly